We write our own bot in .NET Core, part I

The word bot is short for word robot . If you associate with our familiar "work" - rightly so. The term comes from the Czech language. The writer Karel Capek used it for the first time in the art of RUR published in 1920
The real originator of the word was Karel's brother, Josef, and the works presented in art are living beings - special versions of human beings intended for hard work. Still, in the collective consciousness, Capek is the creator of the mechanical robot figure.

In fact, humanity has dreamed of mechanical helpers for thousands of years and it has been said that these dreams have been carried out more than once. There are many legends about mechanical servants or golems. Apparently Talos was a huge mechanical warrior who patrolled the sea waters around Crete and protected her from pirates.
Software bot
Today we will take a closer look at the software bot - and even try to write it ourselves. A bot is a program or service that can participate in a conversation with a human being. We can communicate with him via text via Skype, Slack, Messenger or by voice, just like with the Google Assistant or Siri on the iPhone.
These types of bots can be the future of how we interact with the software. Filling in the forms and selecting options will be replaced with a conversation, during which we will tell the context that understands the assistant what we want.
From the software side, we can distinguish a common pattern of writing:
- We write so-called reactions to occurring events
- Plugin (plugin) architecture allows you to write so-called respondents (this can be seen particularly well in the Google and Alex assistant, where everyone can extend the assistant's capabilities)
The choice of technology
In order to give an example of how we can write our own bot, I chose the .NET Core framework and the C # language. I did it because of its availability, multiplatformity, lightness and simplicity. It works everywhere and does not require a lot of downloading. The .NET Core SDK is installed from here .
As an editor and IDE, I can recommend the Visual Studio Code, available for download from here . We can also do without it and write in any text editor.
By installing .NET Core, we gain access to the dotnet command, which is used to build and run our applications.
What you need to know to get started
To pass the lesson here, you should:
- Know some programming and object languages (understand more or less where the class is, and where the method ...)
- Be able to install and configure the program (Windows, MacOS or Linux - .NET Core is multiplatform)
- Be able to work from the command line - eg set up a folder and go to it
- Be able to manage a created group (band) on Slack
All examples can be run on Linux, MacOS or Windows.
Here we go
To create a new project in .NET Core technology, we set up a new directory, go to it (all of this is done from the command line). We do not have to be an administrator.
Then enter the command line:
dotnet new console
This creates a new .NET Core project in the current directory based on the command line application template (so-called console). This is a standard Hello World program.
We can then start it with the command:
dotnet run
If you want to edit files using a convenient editor, you can use the command to invoke Visual Studio Code in the current directory
code .
What do I cry - syntax C #
The newly created program now consists of only one Program.cs file. Recall the basic concepts associated with the syntax of C # languages on the following screen.
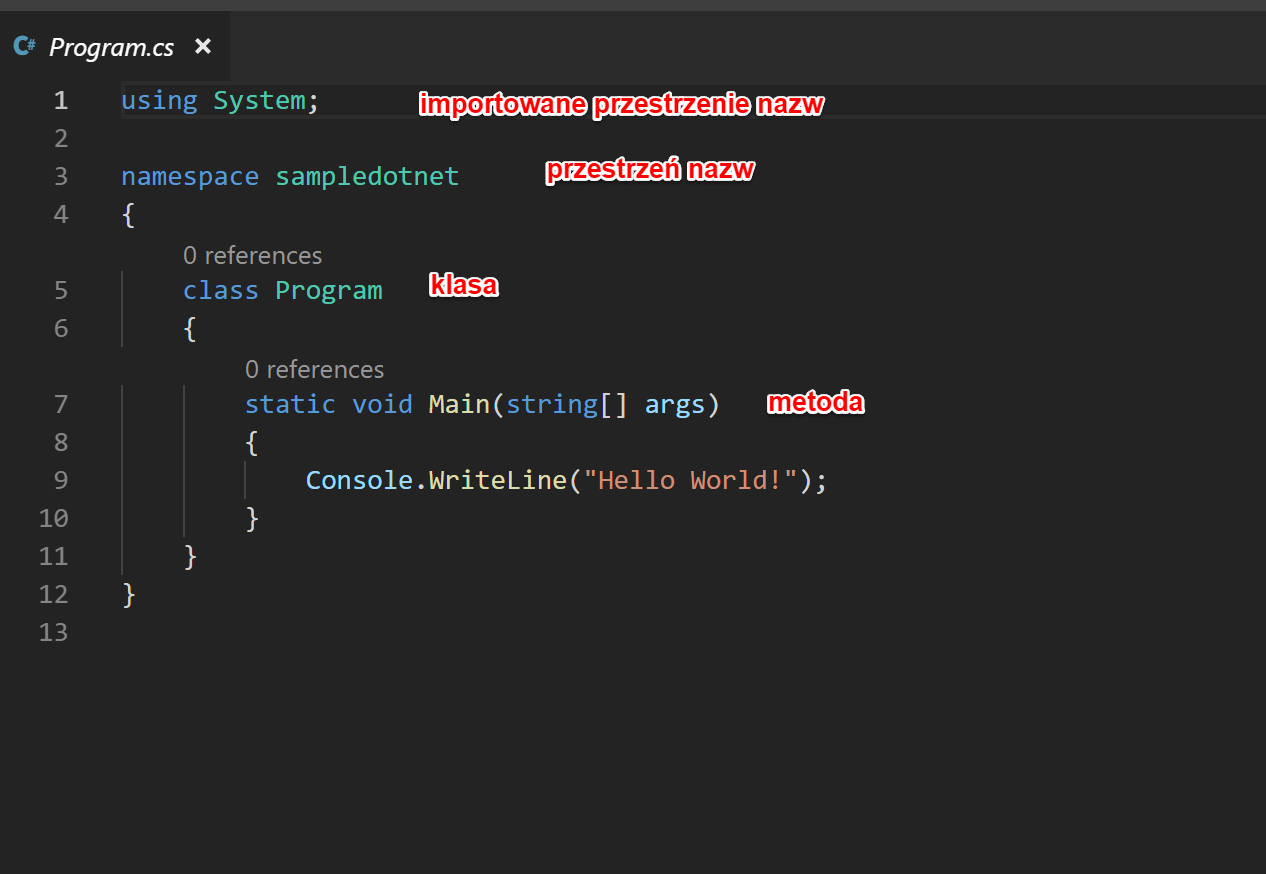
The most important in this file are:
- The
usingsection - which contains information about the namespaces we import into our project. - The
namespacesection - containing the namespace of our code - the framework created it by default based on the folder name -
classsection - here we define the class. Due to the fact that this is a special case - a command line application, the Program class was created to run such programs -
Mainmethod - as in many other programming languages, this method is called entry point - it is automatically called by the run command via the framework. As we can see, Main also has parameters - in the args array we get parameters from the command line.
To easily program the bot for Slack, we will use the MargieBot open source library. Because it is available in the NuGet catalog, it is enough to write on the command line:
dotnet add package MargieBot
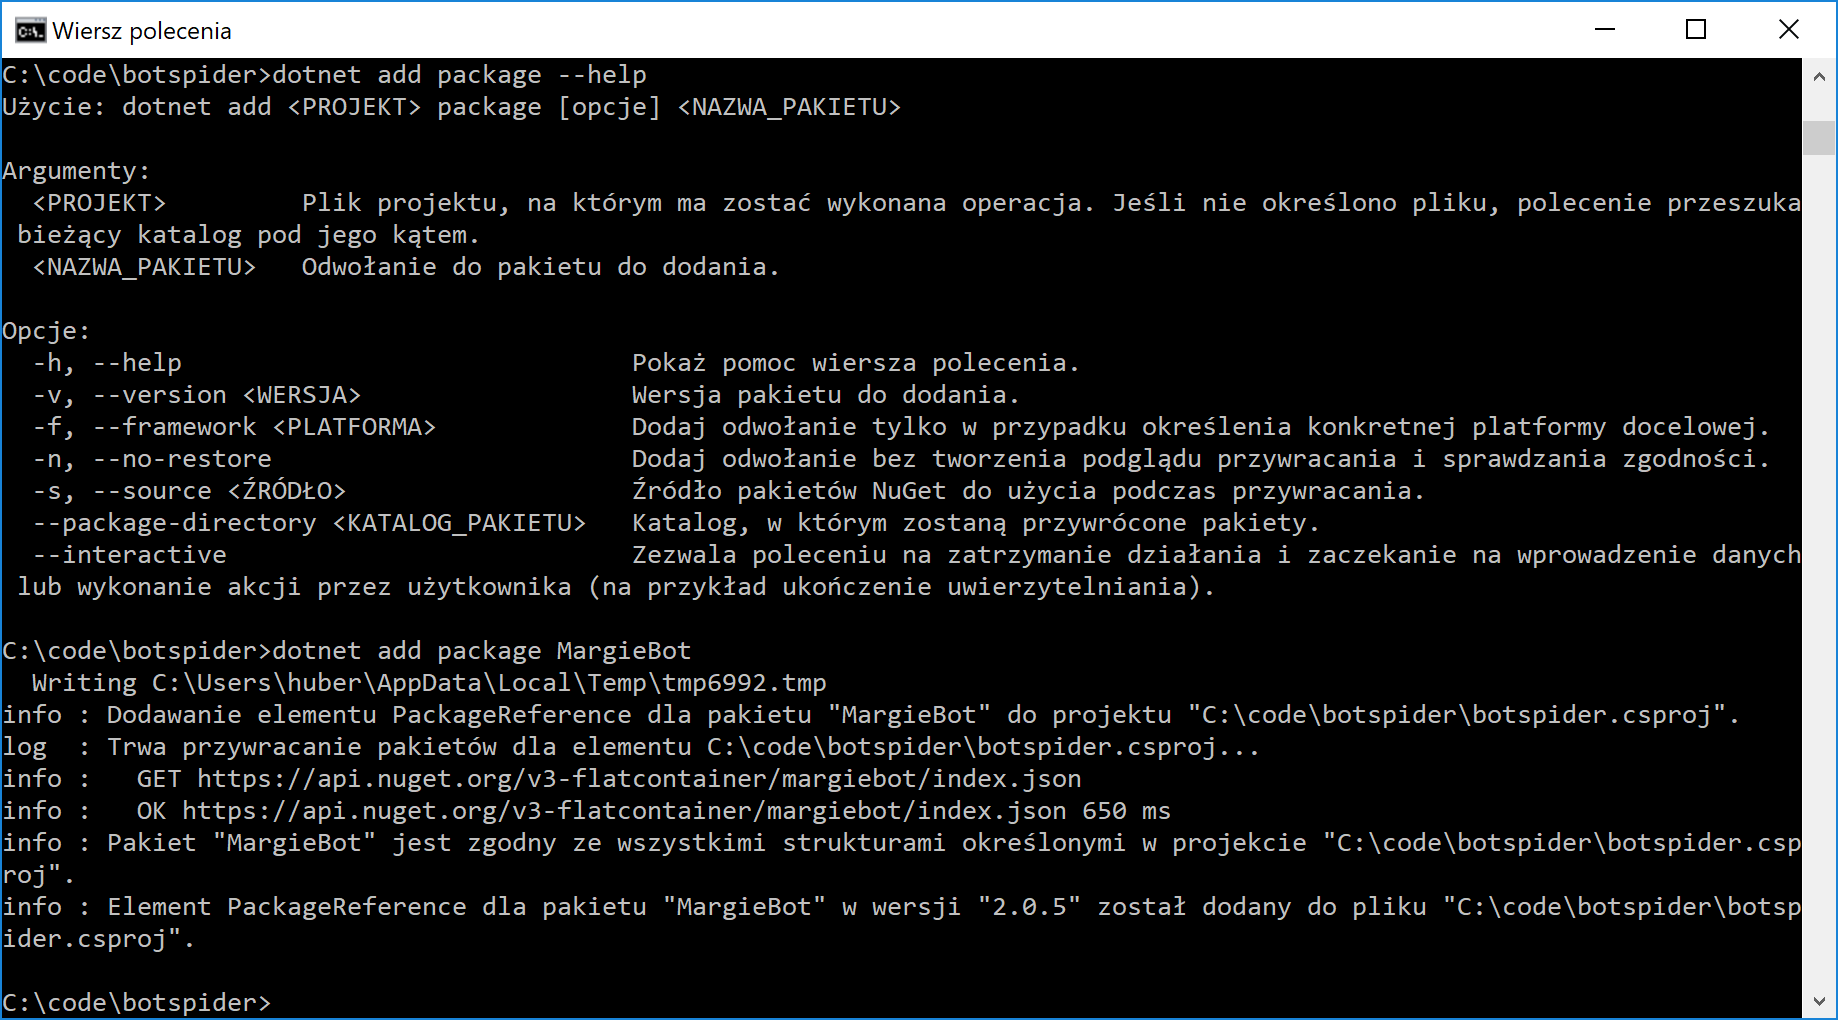
If we look at the .csproj file in our project, we notice that the appropriate reference has been added to this file.

The newly added library refers to several others, we have to solve these references by calling
dotnet restore
You can also press the corresponding button in Visual Studio Code, which will call this command for us.
Slack preparation
We can connect our bot to every existing Slack band. For this purpose, I started a new band in Slack.
To enable our bot to participate in discussions, we must add it in the administration panel.
We choose Administration -> Manage apps to enter the appropriate panel.

Then we enter Custom integrations and see the Bots section.
We click on the options of the new bot and we are able to configure its name, icon, and set several other options. However, the most important thing is the information contained in the Token API field. We will need this string of characters so that our bot can find the right Slack installation. Let's copy it.
Then we can add our new bot, using its name, to the channel - just like an ordinary user.
Preparation of the basic bot using the MargieBot library
After configuring Slack, we return to our program.
In the Program.cs file, add the using (below existing) command to use the MargieBot library namespace:
using MargieBot ;
Delete the existing call in the Main method Console.WriteLine and add:
Bot myBot = new Bot() ;
myBot.Connect("<tutaj wstawiamy klucz API Slacka>") ;
Console.Read() ;
The last command is to stop the program and prevent it from exiting. You should treat this solution as temporary.
We run our program with the command
dotnet run
Be choosing the Debug command in Visual Studio Code -> Start Debugging . By default, we can also press F5.
Leaving the program running, let's log in to our Slack. We will see that in the Applications section there appeared an active (with a green dot) bot with the name defined by us. First cats for fences.
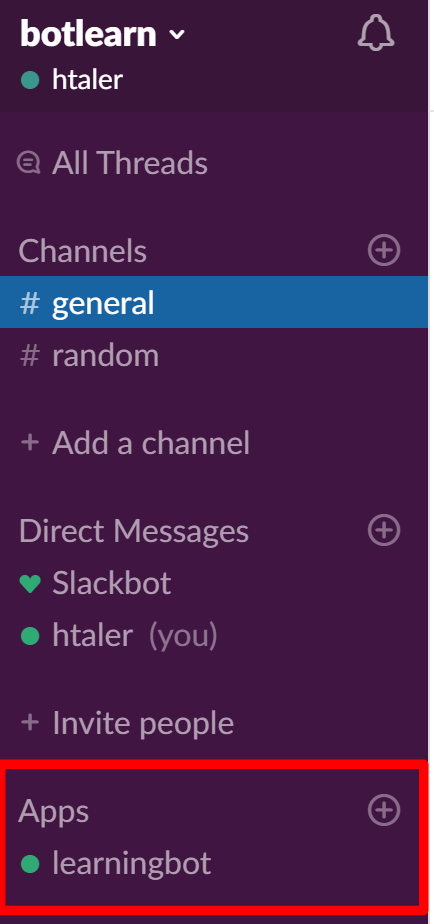
Let's try to write to him:
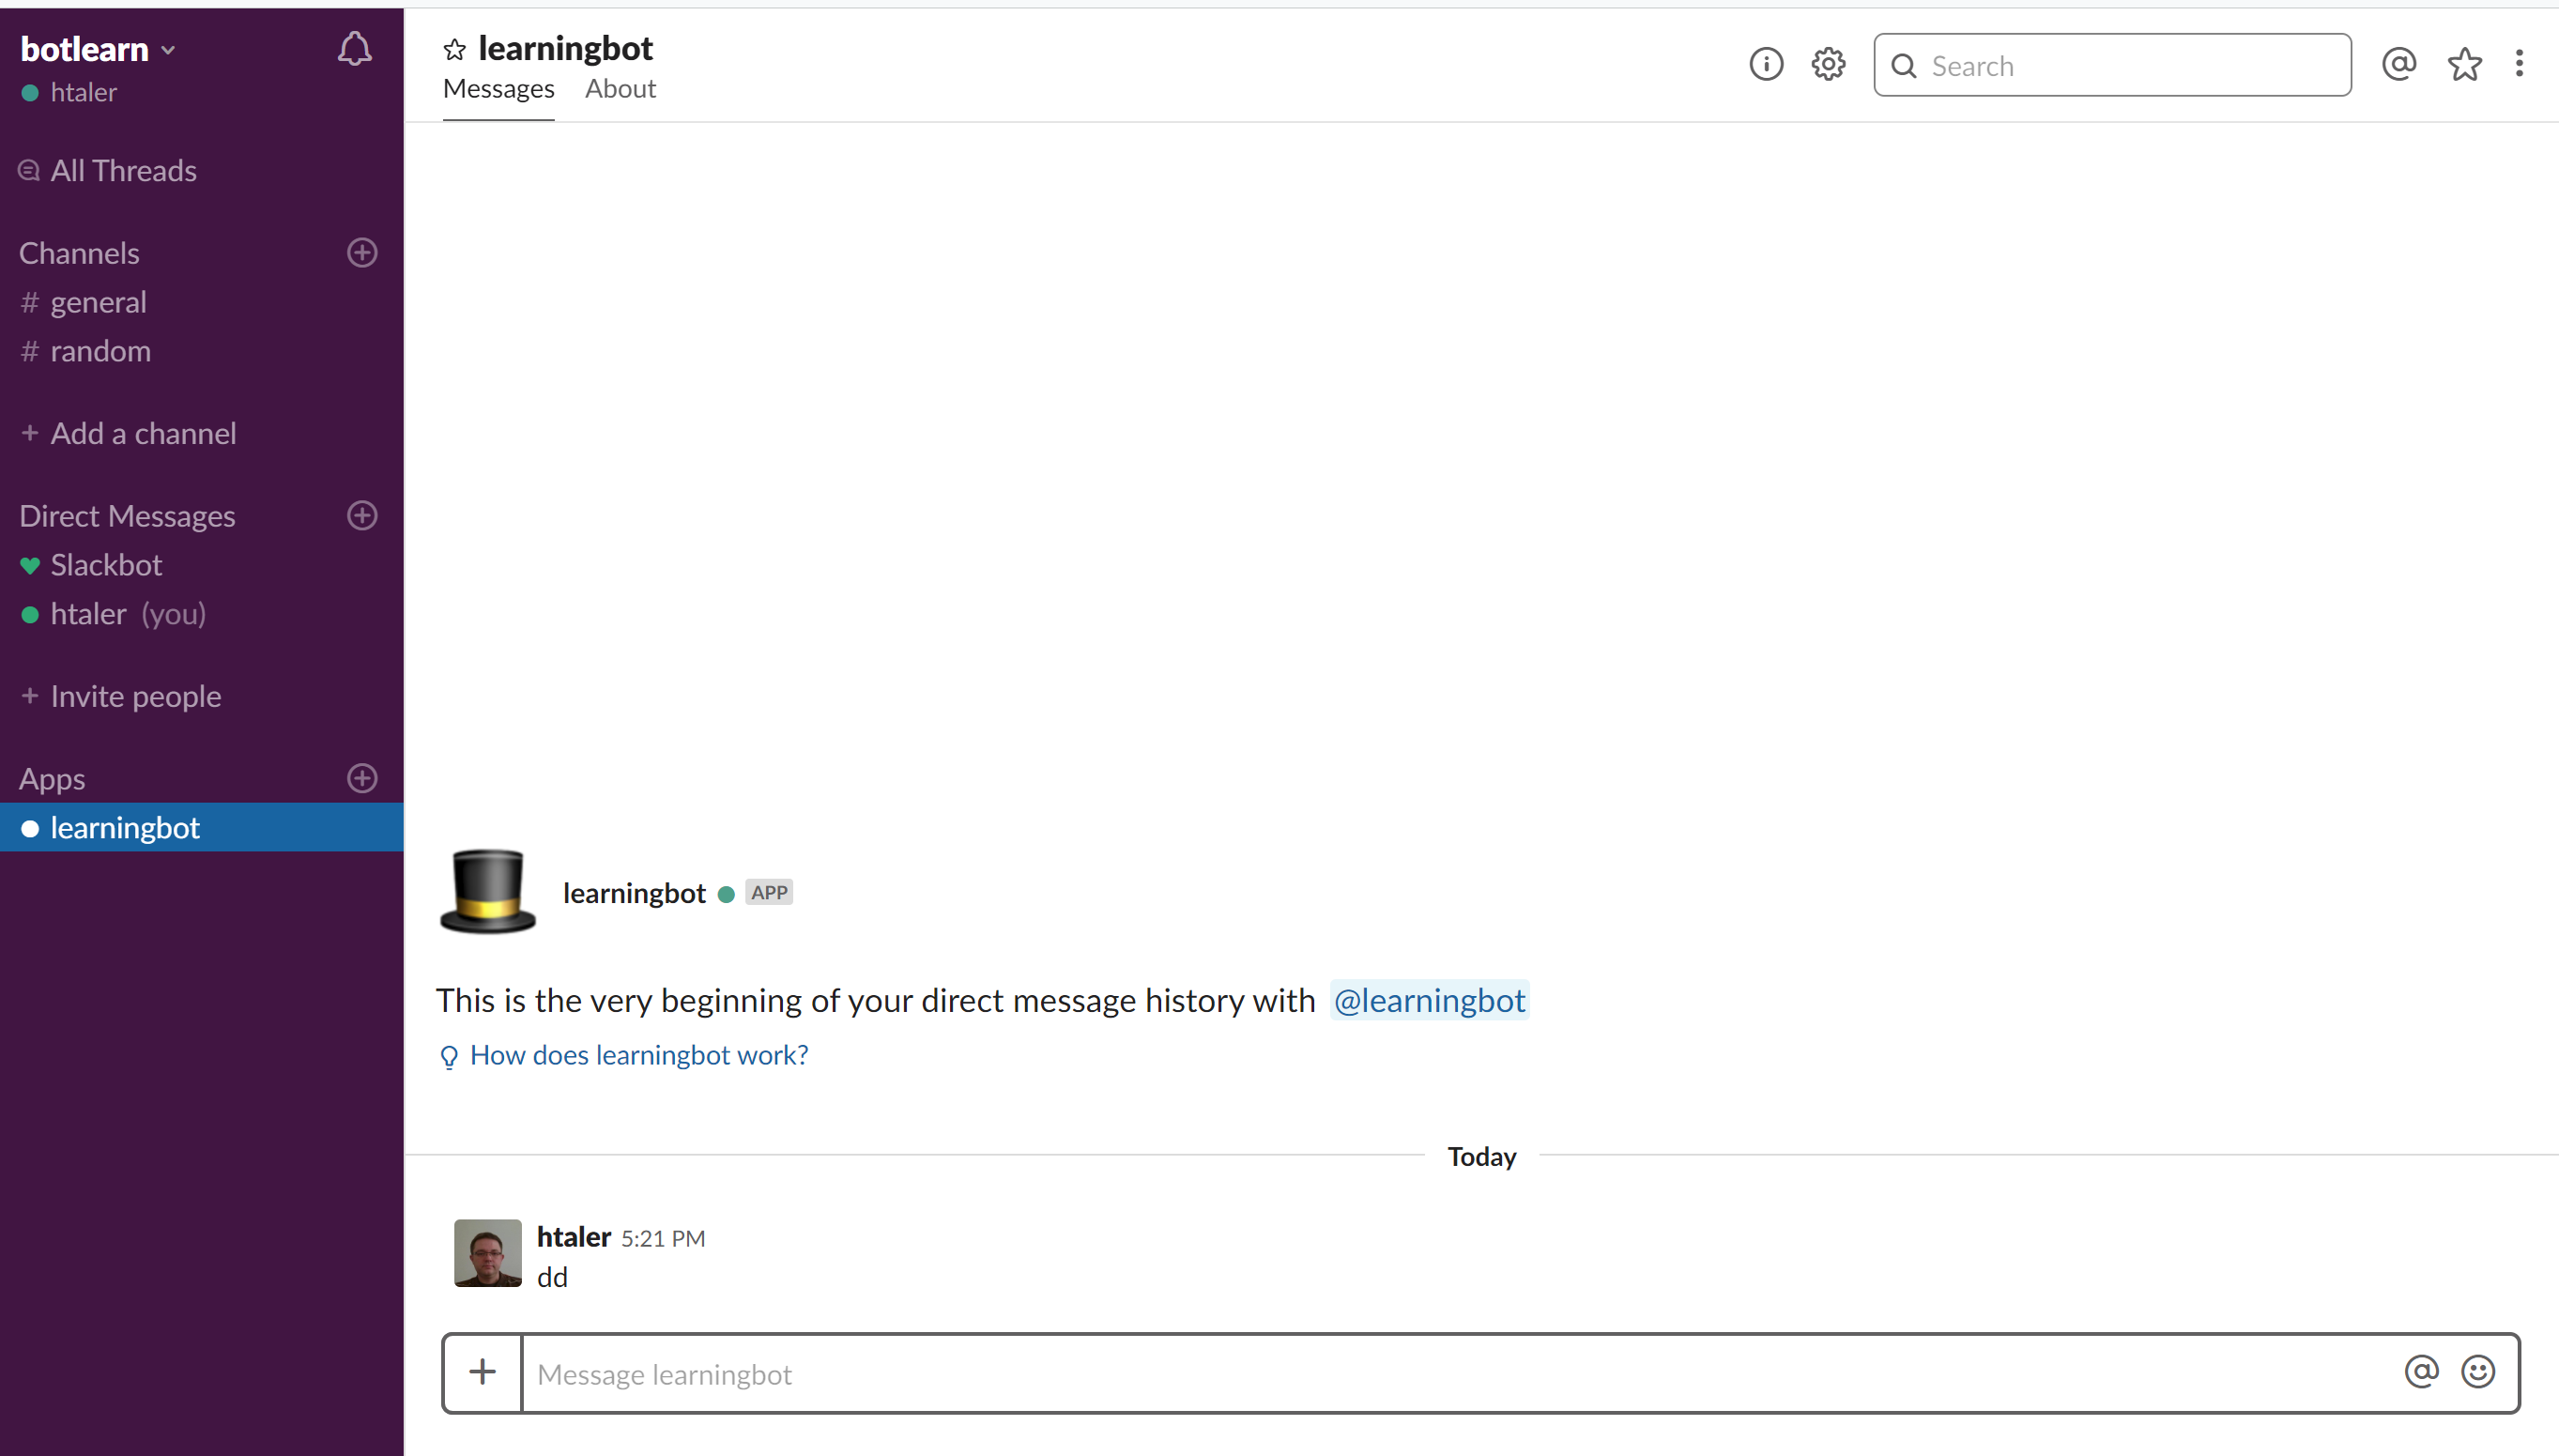
As we can see in the running program, we received a message:
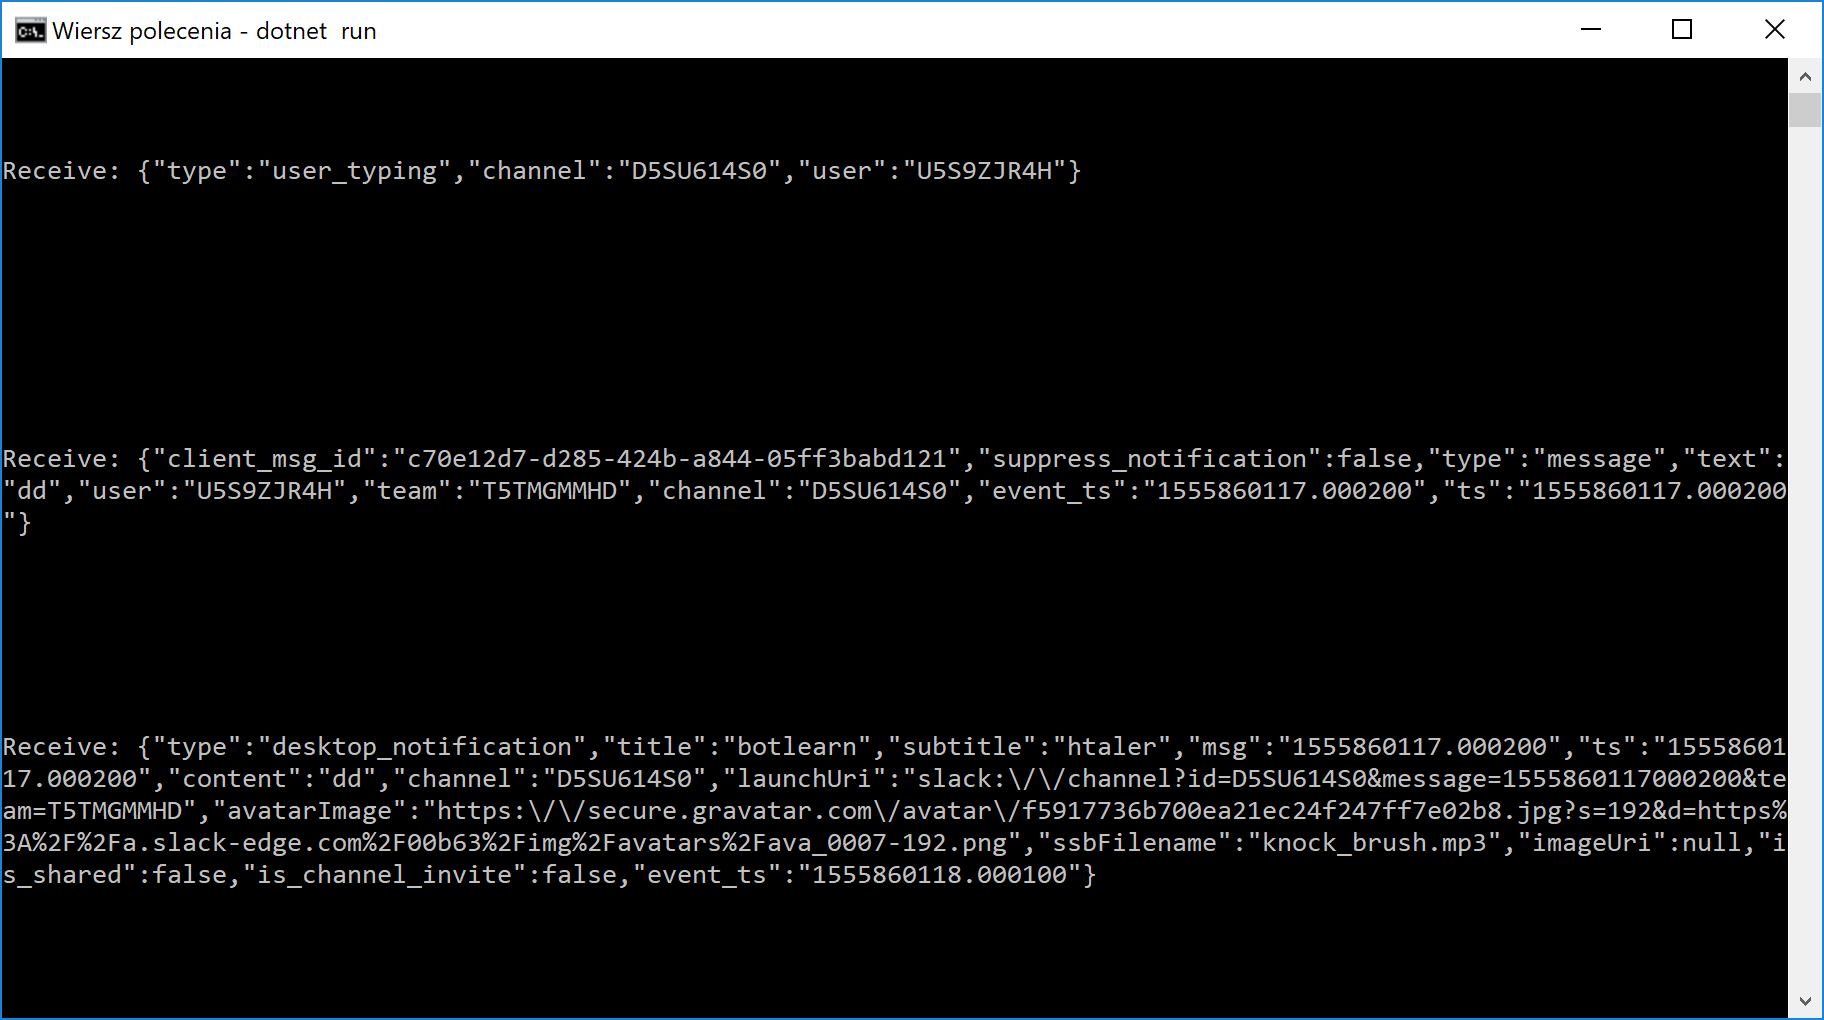
We receive a message regardless of whether it was a private message or the so-called mention, i.e write on the #general channel or other @ @swimming, e.g. "@navwabota hi colle".
We leave the program using Ctrl-C (command line), or by clicking "Stop Debugging" (Visual Studio Code). Returning to Slack, we notice that the dot next to the name of the bot has become gray.
We are teaching the bot new things
We managed to run the bot and receive a notification about the received messages. We used the infrastructure of the popular Slack program for this. Time to teach him something useful now.
Programming the simplest bot responses
At the beginning, let's add a simple response to the keyword. This is the basic ability that is also used by bots of various companies, as well as Siri.
We will use the functions provided with the MargieBot library for this purpose. We need to use the function provided by the Bot object from this library RespondsTo().With() Important: this function returns the same object, which makes it possible to combine them into strings.
For example, we can try to answer the "coffee" chain.
myBot.RespondsTo("kawa").With("ze śmietanką czy bez").With("espresso raz").With("zapraszam na filiżankę") ;
From now on, our bot will react to the word "coffee" using one of the defined answers. We restart it ("dotnet run").
Programming more complex answers
To be able to program more complex logic, we need to create a class that implements the IResponder interface provided by the MargieBot library. Let's create a new SimpleResponder.cs file
We can do this by selecting New File in the Visual Studio Code (or, if we have the "C # Extensions" add-on, create a new class file straight away).
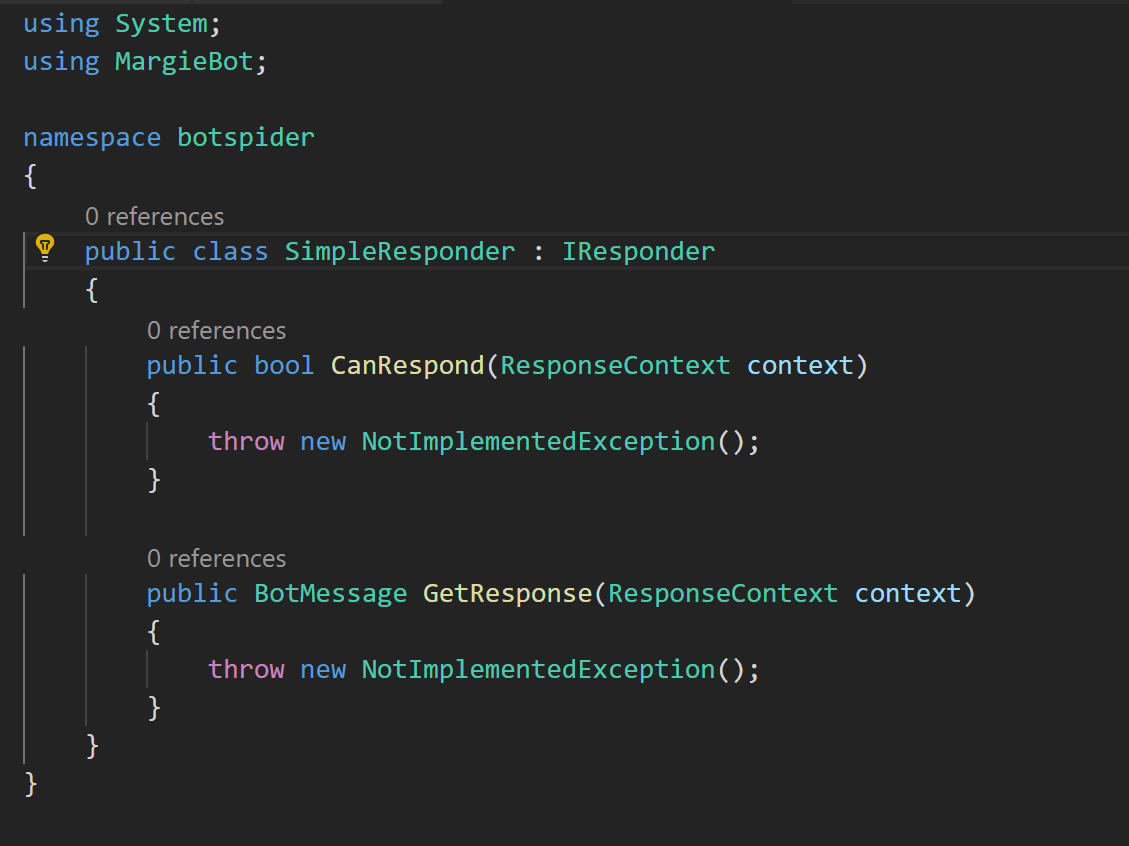
We implement the CanRespond method so that it allows us to decide whether to run the logic of a given "responder". Suppose we want to write one that responds to the Hello. We indicate the implementation interface, giving its name after the colon.
The GetResponse method is more important, which allows us to create an answer by creating and returning a BotMessage object.
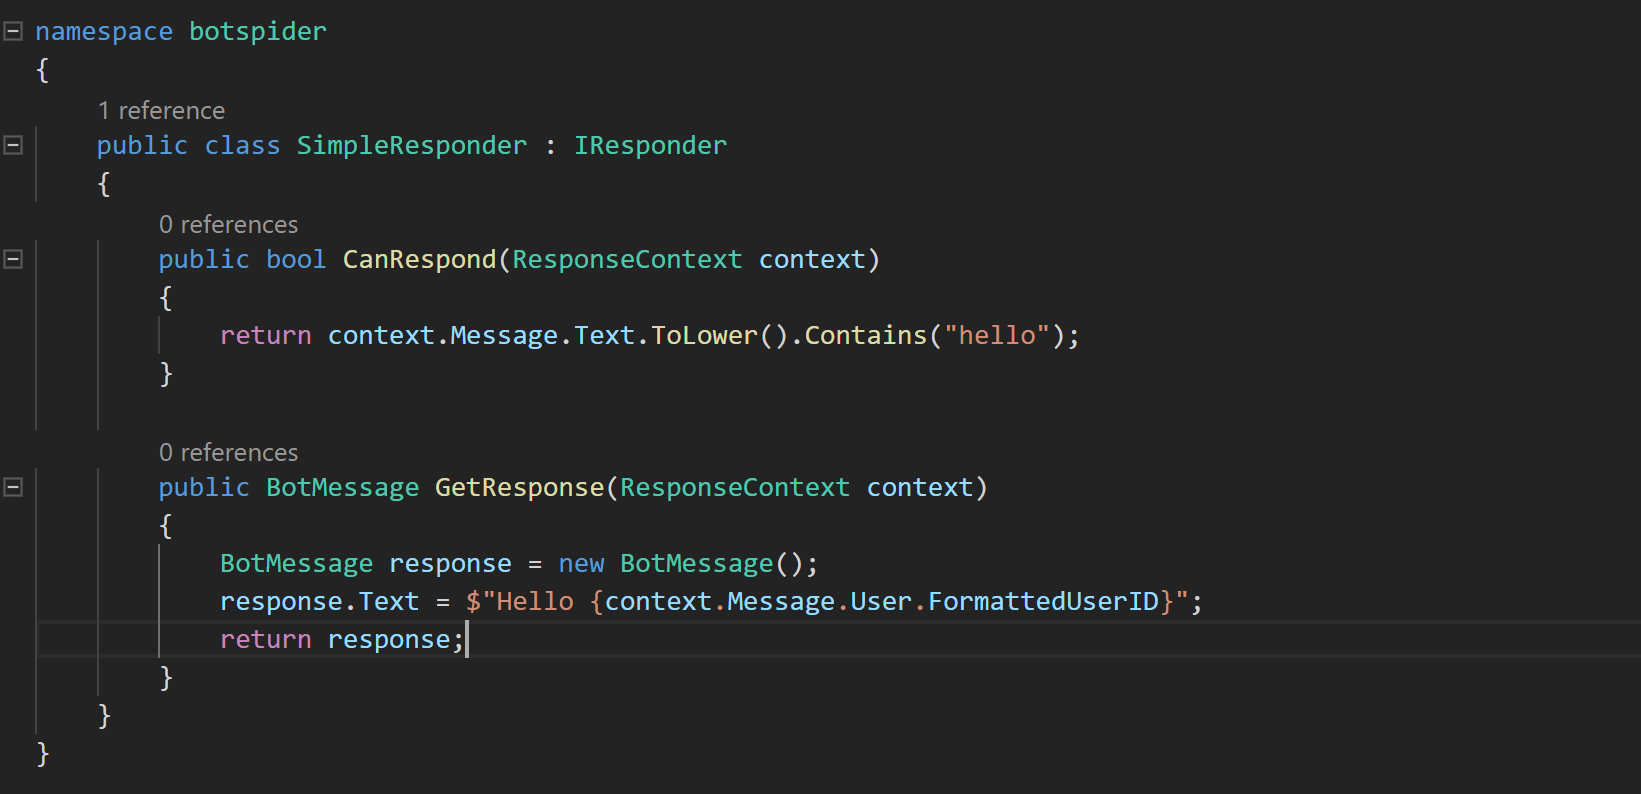
The creation of a new class is not enough, we still have to pass this type of object to our bot. We return to the Main () method.
myBot.Responders.Add(new SimpleResponder()) ;
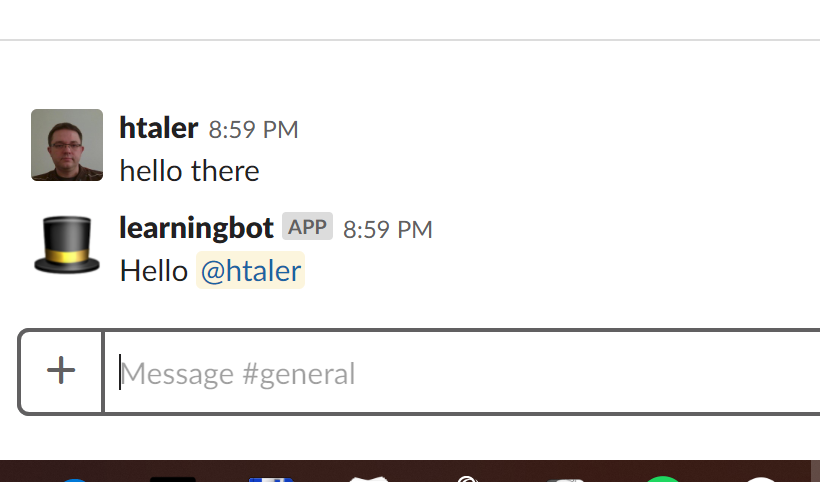
As we can see, Responders is a collection. This means that we can have any number of responders operating in one bot. We intend to use it, but first - try the new bot function. Let's run it, and then write the text containing the word "hello" to it.
We teach our bot new tricks
In the next part of the article, we will create a new responder who will be able to answer questions related to the weather in the given city. We will take this opportunity to show you how to connect to the public REST interface that gives us the data. When we succeed, the next thing we will teach our bot will be a function that can actually be called artificial intelligence ...
We write our own bot in .NET Core, part I
Comments
Post a Comment